Struggling to remove that stubborn Apple Watch band? You’re not alone. Many find themselves wrestling with their wrist accessories, wondering if they need a degree in engineering just to swap bands. But fear not! With a few simple tricks, you’ll have that band off in no time, leaving you free to flaunt a new style or simply give your wrist a breather.
Understanding Your Apple Watch Band
Apple Watch bands come in various styles and materials, making them versatile accessories. Understanding these types simplifies the removal process.
Types of Apple Watch Bands
Apple offers multiple band styles, including Sport Bands, Leather Bands, and Milanese Loops. Sport Bands feature silicone for durability and comfort during workouts. Leather Bands add a sophisticated look for formal occasions. Milanese Loops provide a sleek, adjustable fit with stainless steel mesh. Each type attaches differently, which impacts removal techniques. Familiarizing yourself with your specific band enhances the ease of changing styles.
Importance of Proper Removal
Properly removing an Apple Watch band prevents damage to both the watch and the band. Incorrect techniques can scratch or wear out the attachment points. Learning the correct method reduces the risk of injury to the wrist as well. A careful approach ensures the band remains in good condition for future use. Additionally, understanding the mechanics behind removal aids in efficiently switching bands for various activities.
Steps to Remove the Apple Watch Band
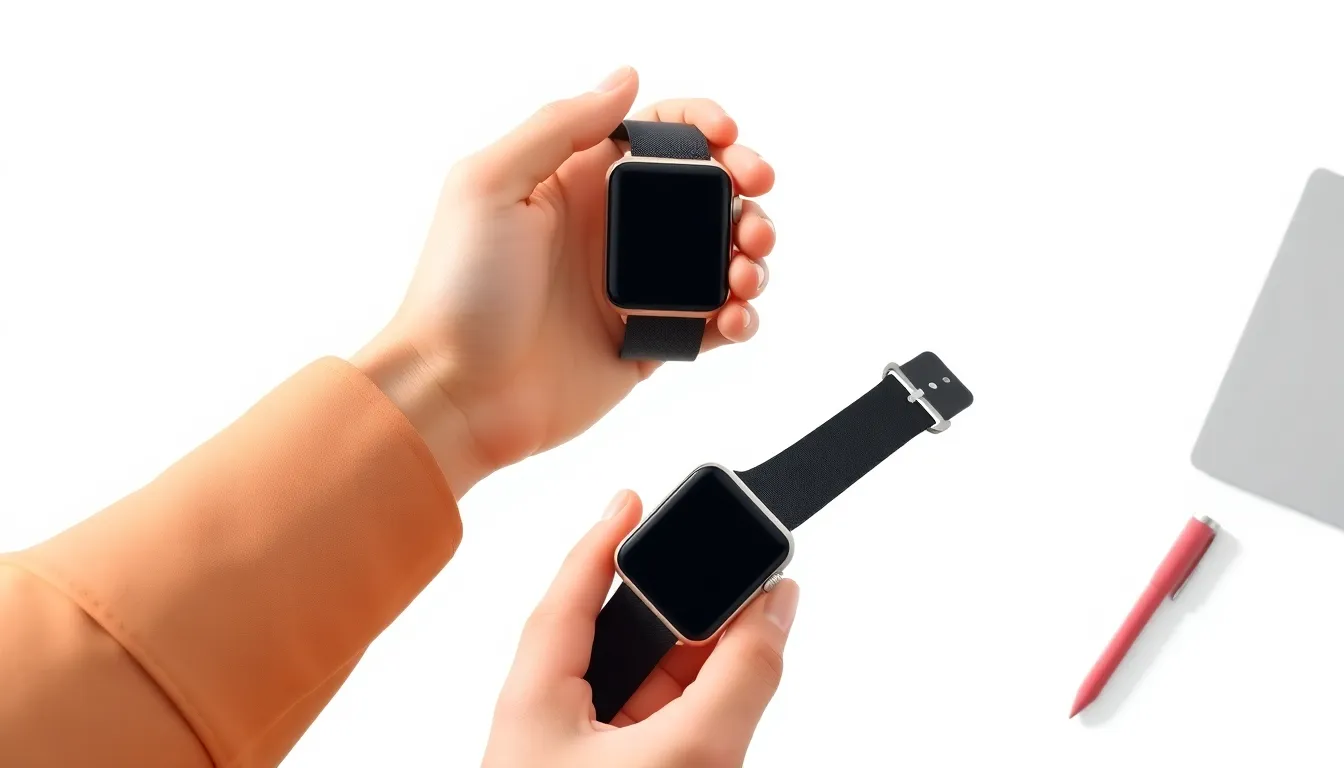
Removing an Apple Watch band can be simple with the right approach. Following a few steps ensures successful removal while protecting the watch and band.
Preparing Your Workspace
Choose a clean, flat surface to avoid losing small components or causing scratches. Ensure adequate lighting so that users can see the band and watch clearly. Keeping nearby tools like a soft cloth can prevent any accidental damage during the process. Collect any bands users plan to switch to, making the transition seamless and efficient.
Step-by-Step Removal Process
Locate the release button on the back of the Apple Watch. Press and hold this button to unlock the band. Slide the band out of the slot while keeping pressure on the release button. After one side is removed, repeat the process for the other side. Always handle the watch gently to prevent scratches. Check both the watch and band for any debris before attaching a new band.
Troubleshooting Common Issues
Removing an Apple Watch band can sometimes pose challenges. Users may encounter problems such as stuck bands or damage risks during the removal process.
Stuck Bands and How to Handle Them
Stuck bands often happen due to dirt or grime accumulation. Debris in the band slot impedes smooth removal. To address this issue, it helps to clean the band attachment area with a soft, dry cloth. Gently inserting a toothpick or a soft brush can dislodge stubborn debris. If pressure isn’t working, applying a small amount of isopropyl alcohol to a cloth and wiping the area can aid in loosening the band. Always ensure to handle components delicately to avoid damage.
Tips for Avoiding Damage
Prevent damage by handling the watch in a secure environment. Use a soft, padded surface for removal to protect against scratches. Before attempting to change bands, confirm that the release button is fully engaged. Checking the band and watch for any signs of wear will prevent further issues. If unsure, consulting the Apple support website offers specific guidance tailored to different band types. Proper care during removal extends the lifespan of both the Apple Watch and its accessories.
Caring for Your Apple Watch Band
Proper care extends the lifespan of Apple Watch bands. Regular cleaning and maintenance help maintain their appearance and functionality.
Cleaning and Maintenance
Use a soft cloth to wipe down the band regularly. For silicone and nylon bands, mild soap and water work well. Rinse thoroughly to avoid residue. Leather bands benefit from a specific leather cleaner or conditioner; applying it lightly prevents cracking. Always check for dirt or grime in the attachment area, as this can hinder smooth removal. Make cleaning a routine part of your watch care to keep it looking new.
Storing Your Apple Watch Bands
Store Apple Watch bands in a cool, dry place away from direct sunlight. Organizing bands in a dedicated box or drawer prevents tangling or damage. Keep bands separated by type to retain their original shape. Avoid placing heavy objects on top, as this could cause deformation. Ensuring proper storage safeguards against wear and tear, allowing users to enjoy their bands for longer.
Removing an Apple Watch band doesn’t have to be a frustrating experience. With the right techniques and a bit of care, anyone can switch bands effortlessly. Understanding the different styles and materials further enhances the process, making it easier to find the best approach for each type.
By following the step-by-step guide and implementing proper maintenance practices, users can ensure their bands remain in excellent condition. Regular cleaning and careful handling not only extend the lifespan of the bands but also keep the Apple Watch looking its best. Embracing these tips allows for a seamless transition between styles and activities, making the most out of this versatile accessory.